It is absolutely mandatory to take regular backups of your WordPress websites to eliminate the risk of data loss. However, WordPress does not offer any tools for that by default. Hence, you need to use a plugin tool to back up your data.
WPvivid is a plugin that offers backup, restore, and migration solutions for a WordPress website. They are ideal for websites of any size. However, you must evaluate this WordPress plugin before relying on it for your data’s safety.
In this WPvivid review, we will dive into its features, pros, and cons to help you make an informed decision.
WPvivid is a must-try for all WordPress users. They offer some great features other than backups. The migration plan is the star of the show as it allows you to have your own staging solution. Overall, we really recommend you give this plugin a try!
We also did research on WPvivid to make an unbiased decision on the core aspects of the plugin. Here is our honest review and rating:
We found that the plugin was quite easy to use. Even a person with no technical knowledge can use it with ease.
One this we really liked about the plugin is, you don’t have to purchase expensive plans to avail yourself of better features. All the features are included in every plan. You just need to pay for the volume of the website you want to manage, which gives you the perfect value for your money.
We really like the self-help resources available on WPvivid’s website. Apart from that, you can also raise a ticket to manage your tickets from their website. However, according to their website, they give priority support to their premium clients. This leaves the client with cheaper plans at a disadvantage. We believe all clients, no matter what they pay, should have equal rights to support.
Features of WPvivid
The best part of WPvivid is that they provide all the necessary features in all of their plans. So you don’t have to pay extra for a specific feature. Some of the key features of this plugin are:
- Include/Exclude Rules: You can create rules to include or exclude certain types of files. These rules automatically back up or skip certain types of files, saving manual effort.
- Schedule Backups: With WPvivid, you can schedule two types of backups: Incremental and general. You can specify file types and cloud storage. Moreover, you can schedule multiple backups in advance.
- Site Migration: This plugin allows you to export your site to a web server, remote storage, or a target site. You can easily migrate your website using this feature of WPvivid.
- Diverse Cloud Type Support: WPvivid supports all major cloud storage sites like Google Drive, Dropbox, OneDrive, Amazon S3, S3-Compatible Storage, FTP, SFTP, Wasabi, pCloud, Webdav, and Backblaze. You can also create backups for multiple locations.
- Rollback Site: This plugin automatically creates backups of plugins, themes, and databases before an update. So, if anything goes wrong during or after the update, you can roll back your website to its previous state.
- White Label: If you manage websites for your clients, you can rebrand the plugin with your own brand name and promote it as your own service.
- Multisite Support: You can also manage, backup, and migrate a multisite network created on WordPress. This makes the management of multiple sites easy and efficient.
WPvivid Pricing & Plans Review:
WordPress has released four plans for WP Vivid. These plans are created based on the size of your profession. With every plan, you can use their image optimization feature without a limit. All the features of the plans are similar. The only difference in the plan is the number of domains you will get to work on.
WPvivid Annual Pricing
| Plan | Price | No. of Websites |
|---|---|---|
| Blogger | $39.2/year | 2 |
| Freelancer | $55.2/year | 10 |
| Small Business | $79.2/year | 50 |
| Unlimited | $119.2/year | Unlimited |
WPvivid Lifetime Pricing
| Plan | Price | No. of Websites |
|---|---|---|
| Blogger | $79.2 1-Time | 2 |
| Freelancer | $111.2 1-Time | 10 |
| Small Business | $159.2 1-Time | 50 |
| Unlimited | $239.2 1-Time | Unlimited |
Note: The Blogger plan allows you to change the domain within 3 days of the plan purchase. However, you can change the domain unlimited times without a time constraint in the other three plans.
WPvivid Installation & Setup
Now that you know all the ins and outs of the plugin, let’s see how it works. You can install this plugin like any other WordPress Plugin from your website’s WordPress dashboard.
After the installation and activation of the plugin, a new WPvivid Backup section will appear in your WordPress dashboard.
There you will find five tabs: Backup & Restore, Settings, Remote Storage, Website Info, and Logs. This section allows you to effectively handle your website’s backups.
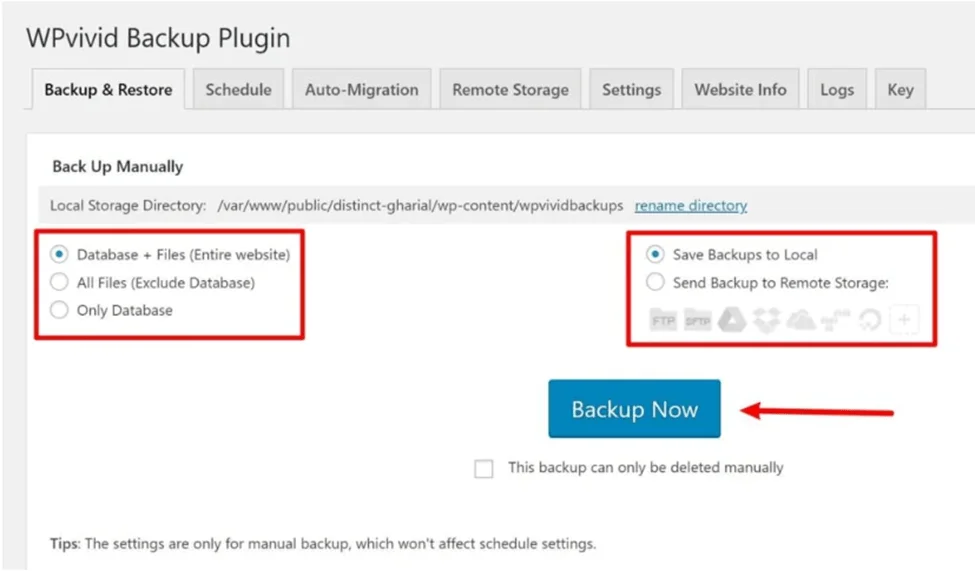
Create Manual Backup
It is super simple to create manual backups of your website. Go to Wpvivic Backup plugin dashboard and in Backup and Restore Tab, you can choose from the “entire website”, “only database”, and “all files” options. These options give you better flexibility and more support for your backup.
These options come in handy when one aspect of your website changes a lot while the other is constant. It saves time and storage space and makes the entire backup process more efficient.
After selecting your desired backup type, choose if you want a local backup or connect to cloud storage.
To connect to cloud storage, you need to go to the “Remote Storage” tab of your plugin dashboard and select from the given storage types.
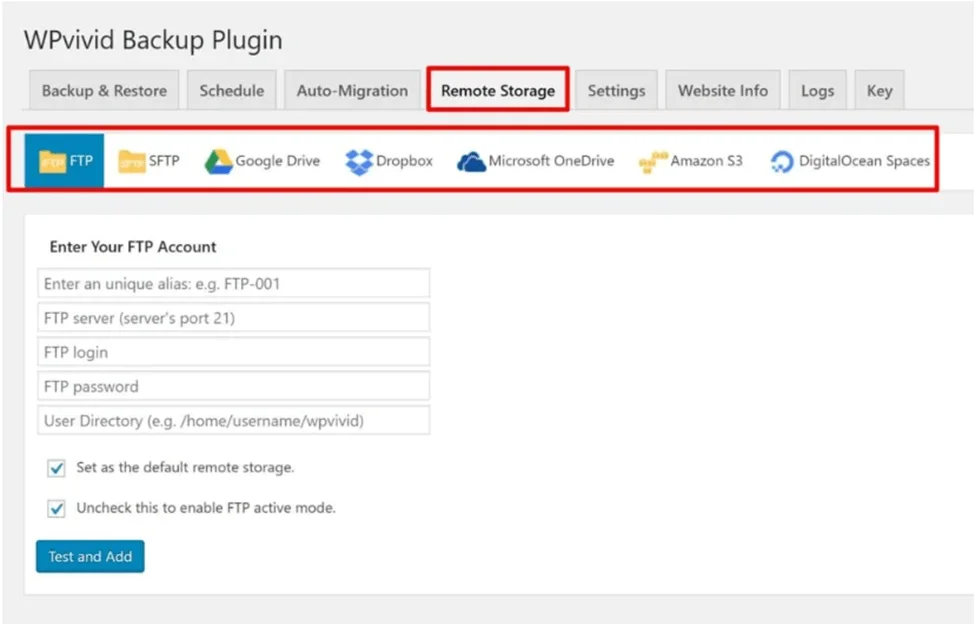
Depending on the storage type you select, you need to follow the steps to connect your cloud to the plugin.
After that, you can select the remote storage option in the backup window and hit the “Backup Now” button.
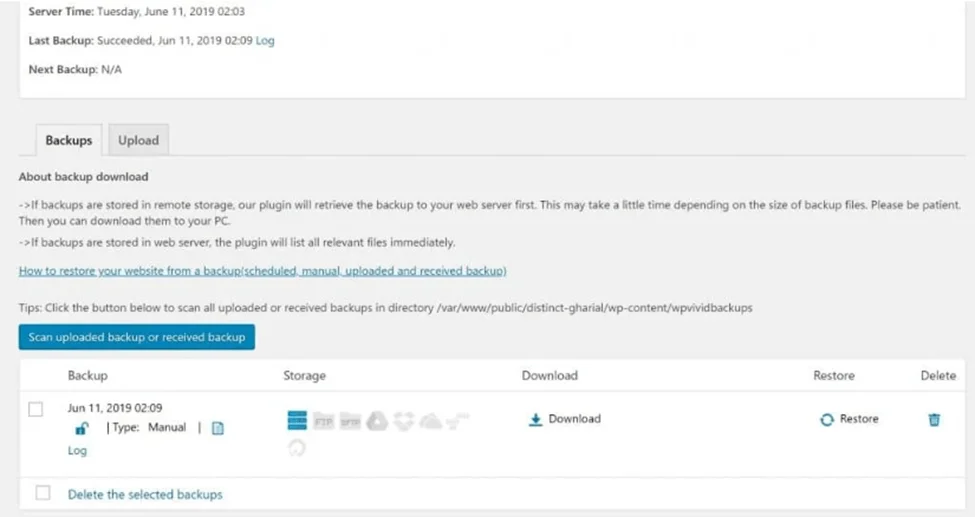
In case you have selected local backup, you can download the backup file by scrolling down the dashboard and clicking on the “Download” button.
Restoring a Backup
To restore your backup, you can simply hit the restore button in the Bckup and Restore tab of WPvivid dashboard.
You can also upload a backed-up file through your WordPress dashboard, or via FTP into the “wpvividbackups” folder.
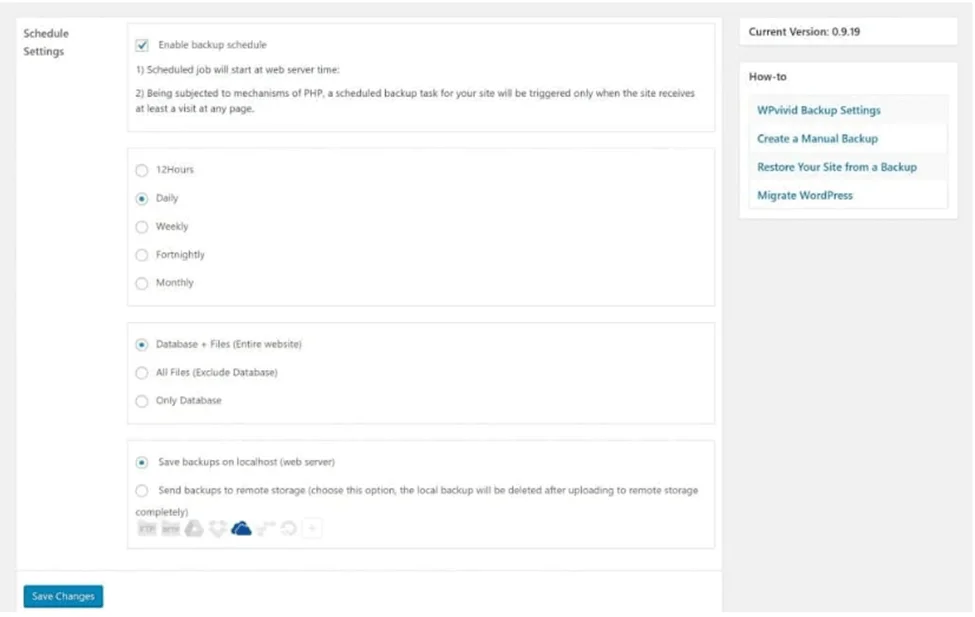
Schedule Automatic Backup
(Schedule Tab)
Scheduling the backups on WPvivid is also quite simple. You first need to choose a time interval between your backups from the following options:
● Every 12 hours
● Daily
● Weekly
● Fortnightly
● Monthly
Then you need to select the type of backup and storage as in the manual backup and hit the “Save Changes” button.
Site Migrations
Site migration is also a very important feature of WordPress Vivid. It helps you to create your own staging solution.
To migrate your website, first, you need to go to the destination or new website and generate a key. You can generate a key by going to the “Key” tab of the plugin dashboard.
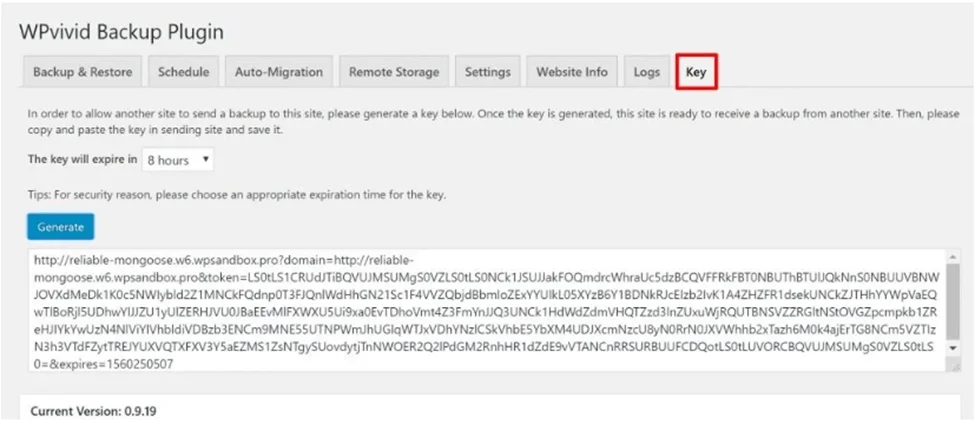
Then go to the source website, paste the key, choose files, and click the “Migrate” button.
WPvivid will send you a backup file to the destination website that you can use to restore. You can also replace the URL or retain the original URL before restoring.
Final Words
Honestly, WPvivid is a must-try for all WordPress users. They offer some great features other than backups. The migration plan is the star of the show as it allows you to have your own staging solution. You can literally migrate your entire website without any technical knowledge upfront thanks to its user-friendly interface.
The limitless backup size and comprehensiveness of their plans are another plus point with this plugin.
Although they do not offer a trial version which we would have greatly appreciated, you can try it for 2 domains for just $39.2/year. You can also ask for your money back within 30 days of purchase if you dont’s like the plugin.
Overall, we really recommend you give this plugin a try!
Then Why wait? Try WPvivid Backup Plugin Today!
WPvivid Review & Ratings – Frequently Asked Questions (FAQ)
WPvivid can be used by everyone managing a WordPress website. No matter if you are a blogger, freelancer, or small business owner, you can utilize WPvivid to backup, recover, or migrate WordPress websites.
No, WPvivid is not free. However, they have a 30-day money-back guarantee. So, you can purchase the plan and in case don’t like it, ask for a 100% refund.
The WPvivid Backup Plugin provides fundamental functionalities like backup, migration, and staging. It enables the creation of a staging site within a subdirectory, offering a secure environment to experiment with WordPress, plugins, themes, and website modifications.
WPvivid provides 4 plans to cater to the needs of people from every business size. The best part about these plans is, that you pay by the volume of the website you want to manage. You don’t have to compromise on the features of the cheaper plans.


Rating: